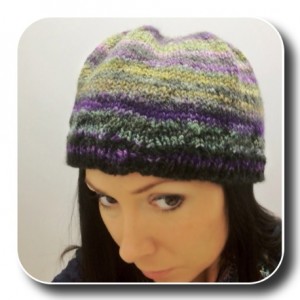
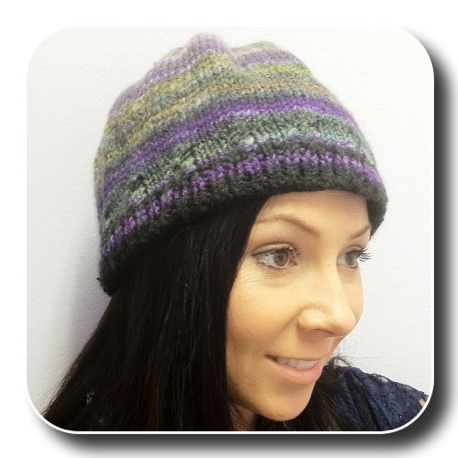
So as promised, here is the pattern for this new hand spun hat I knitted. (By the way, did you know the past tense of knit can be either knit or knitted? I looked it up)
Size:
1 size fits most adult heads. It is meant to be worn down over the ears.
Finished Measurements:
22″ in circumference, 8 inches in height
Materials:
Yarn: I used my own hand spun worsted-weight wool (Colorway: Esther, Falkland wool from FatCatKnits.com), Navajo-plied. Any basic worsted-weight wool should work.
Needles: US 7, 16” circular (or longer if you use the Magic Loop method) or DPNs
Abbreviations:
bcc=back cross cable, worked over 4 stitches (see this link for info if you’re unfamiliar with cables. Scroll down to Back Cross Cable, but keep in mind we are working it over 4 stitches total: 2 stitches crossed over 2)
co=cast on
k=knit
k2tog=knit 2 together
pm=place marker
st=stitch
Gauge: 20 st/4 inches
Notes:
•Stockinette stitch, as we are working in the round, simply means to knit every stitch.
•I used the long-tail cast on method.
Pattern time!
Band:
CO 112 st. Being careful not to twist your st, pm and join for working in the round.
Work K1, P1 ribbing until piece measures 1.25 inches from CO edge.
Cabling Band:
We’re going to create a little bit of cabling to help pull the hat in and shape it a bit.
Rnd 1: K
Rnd 2: (K3, work a bcc over 4 st) around.
Rnd 3: K
Rnd 4: (K3, work a bcc over 4 st) around.
Body:
Work stockinette stitch until hat measures approximately 5 inches from CO edge.
Crown:
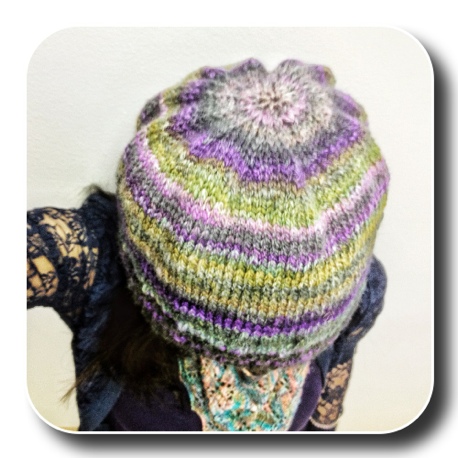
Rnd 1: (K6, K2tog) around.
Rnd 2: K
Rnd 3: (K5, K2tog) around.
Rnd 4: K
Rnd 5: (K4, K2tog) around.
Rnd 6: K
Rnd 7: (K3, K2tog) around.
Rnd 8: K
Rnd 9: (K2, K2tog) around.
Rnd 10: K
Rnd 11: (K, K2tog) around.
Rnd 12: K2tog around.
Rnd 13: K2tog around.
Cut the yarn and thread the tail onto a darning needle. Run the needle through the remaining live stitches and cinch them up to close the hole. Weave in the tail and all ends and block as desired into your preferred shape. Here is one way to do this.
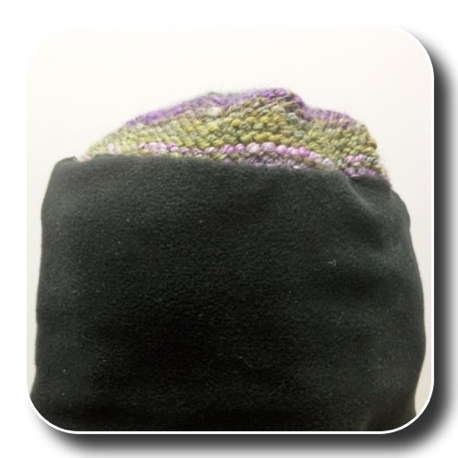
You can be finished at this point if you like. But I lined mine with a polar fleece headband.
I cut a strip of polar fleece about 4 inches wide and 22 inches long (yes, exactly 22 inches)
I placed right sides together and sewed the two short ends together, with about a half inch seam to create the headband shape. So this reduced the headband circumference to 21 inches.
I then placed the headband into the hat, stretched it and pinned it, and then whip-stitched the top edge and bottom edge to the inside of the hat, using a regular needle and thread. The raw edges stay put, so no need to first sew under the edges.
And voila. You have a nice polar fleece lining. It’s not as hot as a fully-lined hat, but helps to keep the ears and skin happy for anybody that has eczema or doesn’t like the feel of yarn on his/her skin. GASP!
The cool thing is, the fleece headband snaps to the skin as it is slightly stretched, for a nice, snug fit (also keeps the wind out!), while the hat is a comfortable loose fit, not feeling too tight. It’s really a great combination.
Here is the hat inside out, showing the headband:
Like all my patterns, this is easy and straight-forward. Even a beginner can tackle this one with no problem!
I whipped this out on my recent trip to England, partly while on the plane and partly while resting up from several days of tromping through London. Glorious times! I even used the 16″ cable needle for the magic loop method to close up the top of the hat. Brilliant!
Any questions, let me know!
Until next time…
Peace & Light
C.


Beautiful I love
What is a 16 inch cable needle.
I know what 16 inch circular needles are, but don’t know what you mean.
Yep, those are the same thing! : )