If you’ve been knitting awhile, you may have experienced what all knitters go through at some point or another. You spend weeks making a gorgeous item, cast off, only to find that the edging is TOO TIGHT!
You can banish this problem foreverrrr – errrr – errr – err – er…
Jeny’s Surprisingly Stretchy Bind-Off will fix this problem for you and all your edges will be SUPPPAH strettttchy.
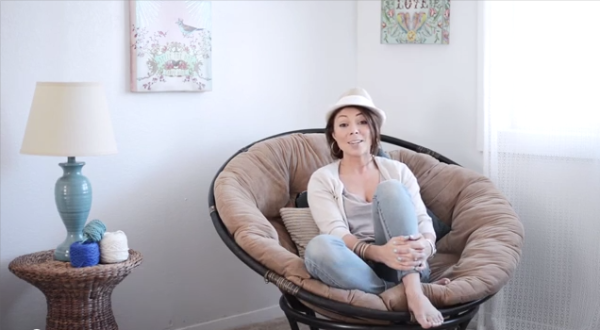
My boo and I created this video for you (he filmed/edited and I just sat there) to demonstrate just how awesome this technique is!
.
In this video, I assume you know how to cast on, knit, purl and bind off in the usual way. If you’re an absolute beginner, please watch my previous how to knit and purl videos FIRST and become comfortable with knitting before attempting this technique.
Those videos can be found here:
HOW TO KNIT – For Absolute Beginners: https://www.youtube.com/watch?v=ONVQCK_-rKc
HOW TO PURL – For Absolute Beginners: https://www.youtube.com/watch?v=2UJcXclkbvg
The rule to remember for this technique is:
•Before every knit stitch, work a reverse yarn-over. Knit the stitch. Bind off.
•Before every purl stitch, work a regular yarn-over. Purl the stitch. Bind off.
You’ll see in the video how I do it.
And that’s it! It’s really super easy and simple! This creates a REALLLLLY stretchy bind off that is great for socks, shawls, scarves, sweaters and any other project where you want an incredibly stretchy bind off. It will change your knitting life forever!
I show you how to do this on some 1×1 ribbing I created.
However, what if you have 2×2 ribbing? Or all the stitches are knit? Or all of them are purl?
You can still definitely work this method! Just stick with the same rule listed above of doing a reverse yarn-over before every knit stitch and a regular yarn-over before every purl stitch. And voila. You will end up with a gorgeous, springy, stretchy edging that will make your knitted projects sigh with relief and glee.
There’s nothing worse than spending weeks creating a project you love only to cast off (bind off) too tightly and find that the item doesn’t fit over your hips or heel or head. EGADS! Nobody wants that!
I use this bind-off in almost EVERYTHING I make where I need a stretchy edge and highly recommend you add it to your list of bind-off techniques.
Remember to SUBSCRIBE to my channel if you liked this video so you don’t miss out on future episodes.
(BTW, I did NOT create this bind-off… that honor goes to Jeny Staiman, whom you can find here: http://www.ravelry.com/people/curiousjeny)
There you have it! Hope you enjoy!
XOXOXO
Chandi
P.S. Please comment BELOW and let me know what videos you’d like to see in the future!


Marvelous, Chandi, thanks! I’ll be back to watch this one for sure.
Best wishes to North Pole from Arctic Circle!
Ciao,
Anna from Iceland
I liked your recent video on Jeny’s bind off but it would be nice if you could also show it doing English knitting and Continental. I have a hard time figuring out the way you do it.
Thank you!!!!! What is your suggestion for stretchy cast on? I usually go up a size or two in needles . But don’t know if there is a special way to make it stretchy.
thanks Chandi
This bind off is wonderful and I will be saving this . Will definetly be using this one in the future.
Thanks TerryLee
Thanks Chandi I just watched your tutorials and loved them. I’ve been wanting to learn to knit with my left hand and now I’ve seen it done! And that bind off is fantastic I have several projects I’ve been hesitating to finish because I have trouble binding off loosely. Thanks
I will try this, but I confess, I am not proficient with the regular yarn over. I will work on it.
Thank you a lot!
Your video and happy personal style are so refreshing to watch. The instructions are always slow, clear and easily understandable. Most of all, I enjoy the radiantly grateful, bubbly, fun-loving style so clearly evident in your videos. Thanks, Chandi!
Thanks, Chandi! I have heard of this bindoff, but never saw it or used it. Thought it would be too complicated. Thanks for showing just how easy it is!! I plan to use it at the very next opportunity.
I love making socks and I have never heard of this bind off; thanks so much! I can’t wait to use this.
Excellent!!! I’ll be reviewing this till it’s set in my head! Great video!
This is great! I’ve been looking at stretchy bindoffs and have been conundrumed by which one will work. I love that there is a knit and purl.
I would be interested in some blocking techniques.
Thanks for sharing this technique! I’m still working on my knitting skills and this will be a great bind off to use on several projects.
“How would you make this stretchy as cast on when making the leggings which needs top and bottom to have stretch?
Thank you Chandi! I just finished the Chocolate Diamonds knitted cowl with the pearlescent worsted. Your video made it so easy, very clear instructions.
I’m so glad that the video helped you!
Your tutorials are so helpful. I am a beginner to intermediate knitter and enjoy all the help you have given me. Needless today, I love all your yarns.
It looks easy enough. Thanks
Good Morning Chandi ~~ I learned to knit way back in the late 50s and I hold my yarn in my right hand not the left as you do. How would this make a difference in the loose bind off? I don’t know that I could change my way of knitting at this late stage of the game. I’m just getting ready to start the Sonder Shawl and I can’t wait to see how it comes out.
Linda, it’ll be fine! I hope you enjoy it!