Thrummed Mittens – How To
I’ve been wanting to make thrummed mittens for months now!
So I spun some wool about 2 years ago (can’t remember what kind it is) into a thick, bulky double:
That picture was taken after I dyed it, but it was originally a pale heather brown. I dyed it charcoal gray with my professional acid dyes, since I wear mostly blacks and grays, not browns:
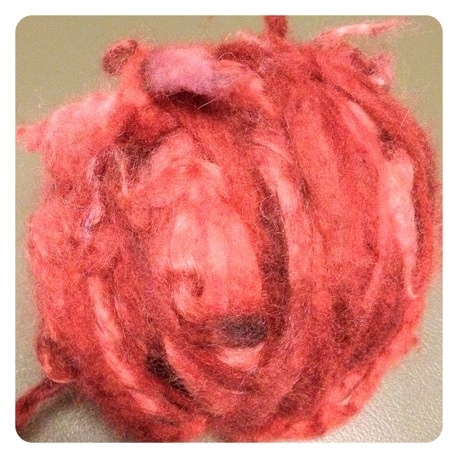
Also about two years ago, I dyed some luxury fiber (a blend of cashmere, silk, cashgora and the like) this red shade:
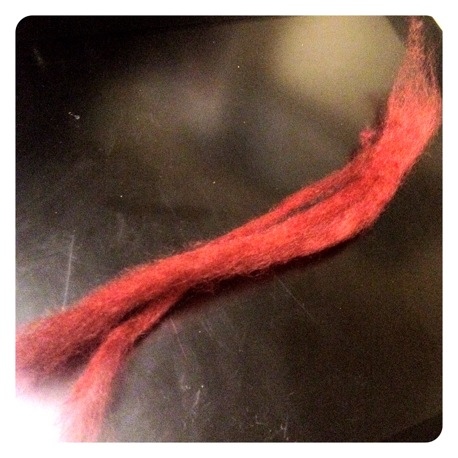
It was lovely, but as I had never dyed luxury fiber before and I didn’t know what I was doing, it slightly felted. Not too much, but enough to make spinning a little more difficult than I prefer. So I chose to leave it as essentially a pencil roving.
I then knitted some thrummed mittens.
HOLY COW. They are warm and delicious!
I was going mainly for warmth here, but still wanted them to look funky and cool.
So I just make up the pattern as I went, and here it is:
Thrummed Mittens – Bulky
This is my first “official” pattern so if anything is missing or unclear, please let me know! Just comment below or send me an email. You can leave these as-is when finished or felt them. Your choice.
These only took me about 2 hours each to complete, so they are super fast and can be made easily in a day as a last-minute gift!
Yarn: Bulky Weight Wool (I used my own hand spun) If you’ll be felting these as I decided to do, make sure you use a feltable wool (make sure it doesn’t say superwash, which is non-feltable).
Roving Tufts: Any wool or desired fiber. Something that will felt is ideal so the fibers eventually tangle around each other and lock into place. I used a cashmere fiber with other luxury fibers blended in because it was already slightly felted into a pencil roving, but normally the short staple lengths might have made this fiber less than ideal. You don’t want a fiber with a staple length longer than 3 to 4 inches, though, or you won’t be able to pull tufts in that length. So a medium-staple length wool is great.
Needle: US Size 11: Either dpns or 32″ or longer circulars. I virtually always use circulars and opt for the magic loop method (which is brilliant, by the way!) when working in the round. But dpns will work just fine too, if you prefer them.
Gauge: 9 st/4 in (You’ll want to use whatever size needles you need to get this gauge)
Abbreviations:
K=Knit
P=Purl
M1=Make 1. Insert right needle into loop between stitches and place onto left needle. Knit through the back loop of this.
K1fb=Knit 1, front and back. Knit the stitch as you normally would, but leave it on the left needle. Knit through the back loop of it as well and then slide it off the needle.
Ktbl=Knit through the back loop (produces a tighter, twisted stitch)
K2tog=Knit 2 together. Instead of knitting one stitch, insert your right needle into two stitches at once and knit them together. You have now decreased from 2 stitches to 1.
How To Thrum: Pull off a length of your roving; about 3 to 4 inches:
Twist it in half:
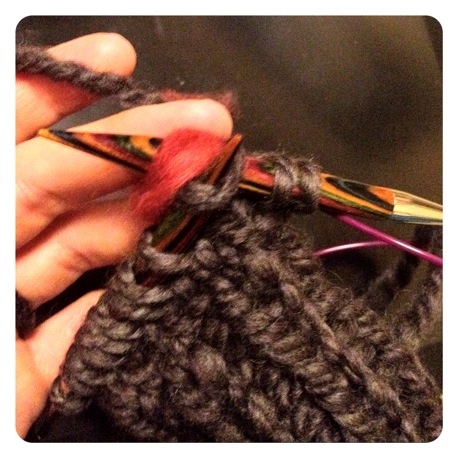
When you get to the stitch you’re going to thrum, insert your needle into the stitch as usual. Lay the tuft of roving across your needle as shown:
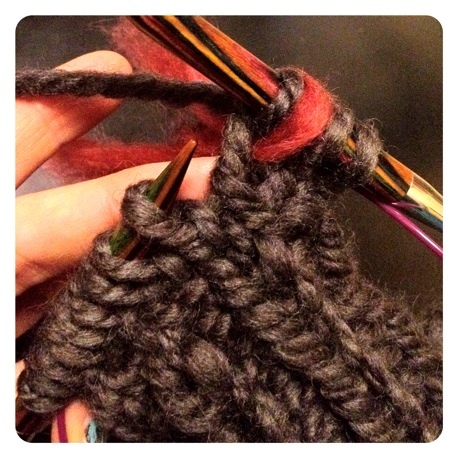
And then knit the stitch, pulling both the yarn and the tuft through the stitch together.
You then have both the tuft and the yarn on the right-hand needle:
Wasn’t that easy? Make sure to tug a smidge on the tuft to tighten it up a bit.
So let’s get started!
CO 16 stitches, using the long tail method. Place marker for beginning of round, and make sure to not twist your stitches.
Cuff:
Work K1, p1 ribbing for 9 rounds.
Hand: Round 10: (K2, m1) around. (You should now have 24 stitches total) Instead of working m1, you can also do k1fb. Either is fine.
Round 11: (K2, thrum 1) Repeat to end of round.
Round 12: (K2, ktbl) Repeat to end of round.
Round 13: K.
Round 14: K1, thrum 1, *(k2, thrum 1) Repeat from * till 1 st is left. K1.
Round 15: K1, ktbl, *(k2, ktbl) Repeat from * till 1 st is left. K1.
Round 16: K.
Round 17: (Thrum 1, k2). Repeat to end of round.
Round 18: (Ktbl, K2.) Repeat to end of round.
Round 19: K.
Rounds 20-37: Repeat the last 9 rounds twice more.
Mitten Top: We’re going to decrease to close the top of the mitten.
Round 38: (K2tog, thrum 1). Repeat to end of round. You now have 16 stitches total.
Round 39: (K2tog). Repeat to end of round. You now have 8 stitches total.
Work kitchener stitch to graft the top of the mitten together. Or work a 3 needle bind off. I opted for the kitchener stitch.
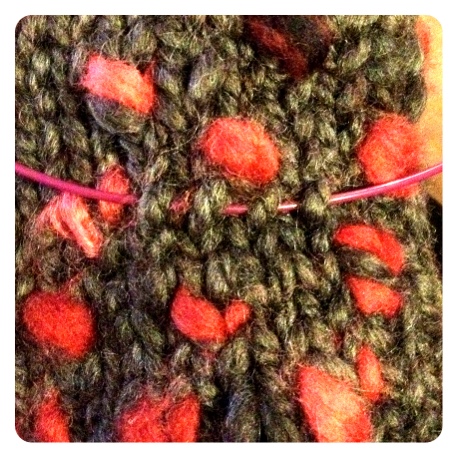
Here is what you get before adding the thumb:
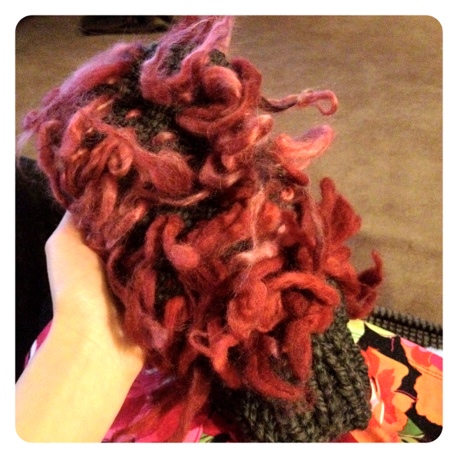
And the crazy inside:
Now, we’re going to work a whole lotta magic and do what’s called an Afterthought Thumb (it’s so brilliant!):
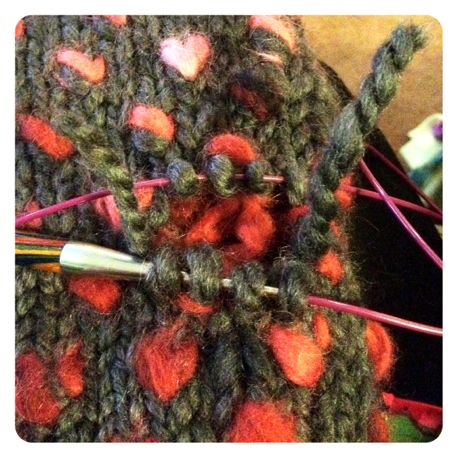
Decide where you want the thumb to be and insert your needle into four stitches as shown:
Then, (READ THIS CAREFULLY!) cut one stitch in the MIDDLE of the row beneath and begin to unravel the 4 stitches of that row. As you do, pick up the 4 stitches on the row below that one. You now have 8 stitches picked up, 4 on each needle and two loose ends. (Weave those in after you work the thumb.)
So now for the actual thumb knitting:
Round 1: K4, pick up one stitch between rows. K4. Pick up one stitch between rows. 10 st.
Round 2: K8, K2tog. 9 st.
Round 3: K1, Thrum 1, K2, Thrum 1, K2, Thrum 1, K1.
Round 4: K1, Ktbl, K2, Ktbl, K2, Ktbl, K1.
Round 5: K
Round 6: (Thrum 1, K2). Repeat to end of round.
Round 7: (Ktbl, K2). Repeat to end of round.
Round 8: K.
Round 9: (K2, Thrum 1). Repeat to end of round.
Round 10: (K2, Ktbl). Repeat to end of round.
Round 11: K
Cut yarn, leaving a 6 inch tail and thread it onto a darning needle. Run it through the remaining stitches as you slide them off the needles. Cinch up the top and weave the yarn onto the inside of the thumb to secure.
Weave the two loose ends remaining from cutting up the afterthought thumb so that you cinch up the holes at the base of the thumb.
Weave in all ends. And done! Sort of.
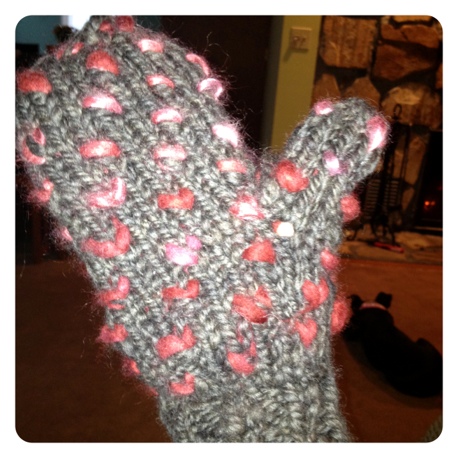
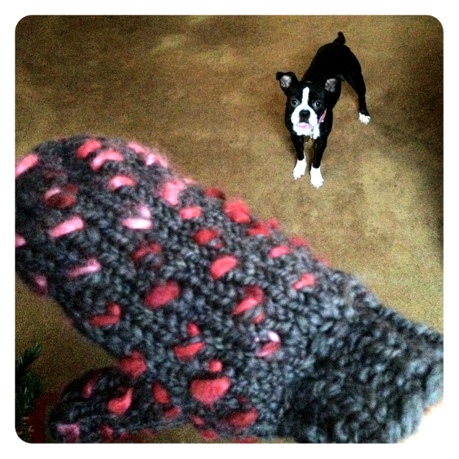
If you choose to leave your thrummed mitten unfelted, you’ll have this (minus the dog):
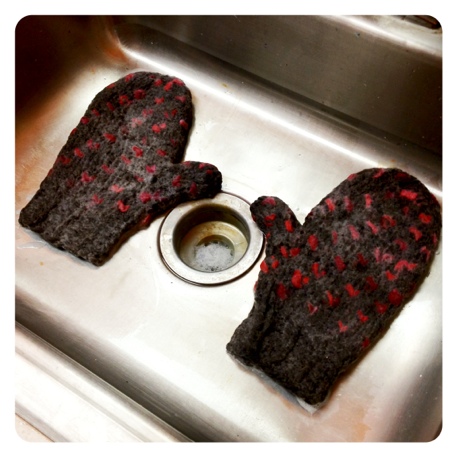
I opted for felting mine as they were a little big. I can’t decide if I’m happy about that decision or not. They were much softer and fluffier unfelted. But fit a little better felted. And look a little sleeker. A word of caution: The thumbs got a little tight after felting, so if you opt for felting, I’d recommend adding in about 2 extra stitches to the thumbs.
So to felt, I stuffed plastic shopping bags up into the mittens to make sure they didn’t felt on the inside and be unusuable (it’s easiest just to wrap the bag around your hand and thumb and stick your hand into the glove. This way you get the thumb too) and pinned the ends shut with safety pins. I then tossed them into hot, soapy water in my washing machine and turned it on, allowing it to agitate the mittens for about 10-12 minutes, checking them for fit every few minutes.
Here they are soapy, and still wet, but felted:
And after a day next to the fireplace, they were nice and dry and ready for wearing!
My hands haven’t been cold since!
So there you have it. Super warm, funky, felted thrummed mittens for our intense 40 below zero F winter days! I hope you enjoy knitting these!





These are great and yOur instructions are wonderful! I have made regular and felted mittens but, couldn’t figure out thrumming. I will be starting a pair this weekend. Thanks!
Oh, you’re welcome! I’m so glad you find the pattern clear. It’s my first official pattern. 🙂 Thanks for your comment!
Could you tell me where I can buy the roving for the mitten if possible
Just look on etsy! There are a lot of great sellers there. -Chandi
Thank you so much for sharing this wonderful pattern! I can’t wait to make my first pair! I think I shall share it on my blog….and of course link your site for the pattern. Thanks again! Lisa
Thanks, Lisa! I’m glad you enjoyed the post! I see you are a potter. I adore pottery and am planning on taking a class on it soon. Gorgeous blog, btw!
So computers are down at work and I’m catching up on your site and came across the thrummed mittens…..intruiged me as I’ve never heard of thrumming. I had to google it to figure out what it was (haha). Have you tried crochet thrummed mittens? Wonder how easy that would be to do….like I need “another” project to do 😉 haha
Hugs from Iowa!!
Sarah
Sarah…
Hmmmm! I have never heard of, nor tried thrummed crocheted mittens. But I bet you could! Just so the stitch is tight enough to hold the thrum in… and eventually the thrums start to felt inside, so I’m thinking it would definitely work!
Let me know if you do try it!
I’d love to hear about it.
~Chandi
Wow – these are amazing Chandi – just what is needed for dog walking and mountain climbing in rural Norway! just one thing – you showed the inside of the mitts pre-felting…but what happens to all that goregous yarn after felting? Do I assume it felts itself into an extra layer?
I love the excitement of felting – and have learnt the hard way you have to stuff plastic inot the insides of bags and slippers so you don’t lose the hole;-) An early attempt at a baby laptop case did service for a while as a sledge seat, but then ended up as soles on a pair of office slippers;-)
PS your dog is gorgeous too!
Oh, thanks, Marion!
Yes, the inside “stuff” felts and matts together and the mitten as a whole becomes very thick and warm. These are my Go-To mittens when it gets 30 below zero and colder here. 😀
Brrrr!!!
Have a good one!
Chandi
Chandi,
These are such a cool idea, I have never heard of thrumming but what a lovely technique for bringing some colour into a project. Love the way you put the thumb in as well, will definitely try this pattern. thanks so much for your inspiration.
Julie
Woohoo!! I see some thrums in my future! Thanks a ton for the pattern!
At this moment I am ready to do my breakfast, after
having my breakfast coming again to read further news.
I used to wear these when I was a child, my hands were never cold! It’s something I’ve always wanted to try. I think I’ll get the yarn and knit some for me and my grandchildren! Thanks for the pattern and instructions!
I have wanted to thrum for the longest time, but never got up the gumption to do it. Not only was his pattern clear, it was also so fast! A mitten a night is my average. It’s a great pattern and it was so fun to knit, I want to scan it down to my kids’s sizes to make some for them. Also, your pattern was written so that someone who has bigger hands can add the appropriate number of stitches and still be able to follow along. Good work.
C: Several years ago I came across thrumming. The history I read said it started in Scandivavia (?) near a wool rug making factory and the ladies used the thrums to great advantage in the cold weather — they thrummed mittens, fronts of vests, tops of socks, hats and anything else that can be used in cold weather. My cold weather experience is to have items a little big so air can circulate around and keep warm. Perhaps in the future you could provide a little history to your readers. Oh, when making the thrums they should be twisted together in the middle, and the middle part knitted, so only loops appear on the inside of the mitten and then by use they will felt themselves and it appears much neater. Thank you for the pattern and all the tips. I have never seen the thumb you showed — I will try it soon! It could be that one could felt the mit and then add the thumb later to insure a good fit. Happy Fibering!! Joy
In making the afterthought thumb, how far in are you cutting the stitches? This is a thumb for either hand? No right or left specifically?
Yes, this is the strategy for creating a thumb with either hand. ❤️
Hi, my name is Christine I am 13, and I am just starting to learn how to knit. I was wondering if you have a video on how to learn how to do the purl stitch? Thanks.
Hi, I am just curious if you have a pattern on knitting mittens but without the purl stitch? Thanks. My name is Christine I am 13 amd just learning how to knit and my dad keeps bugging me to knit mitts but I don’t know how to do the purl stitch. Thanks again Chandi.
Hi, my name is Christine I am 13 and just learning how to knit. My dad has been bugging me to knit him a pair of mitts. But I don’t know how to do the purl stitch and most patterns cal for it. So I was wondering if you had a pattern for mittens without the purl stitch or if you had a video on how to purl stitch?
Thanks again Chandi
I do have a video on how to purl stitch. You can find it here – https://www.youtube.com/watch?v=2UJcXclkbvg. ❤️
Thanks so much. I am sorry for sending 3 comments I didn’t mean to my be ice was going wacky😜 Thanks so much I just watched it and thanks to u I now know how to do the purl stitch.
Perfect! So glad that the video helped! No worries about the comments, I love them all!❤️
Ok thanks so much again and all your guys yarn is so pretty aspecially the wolf moon one.❤️
Thank you! ❤️
What size is this? Also, is there a way to make the top less pointy?