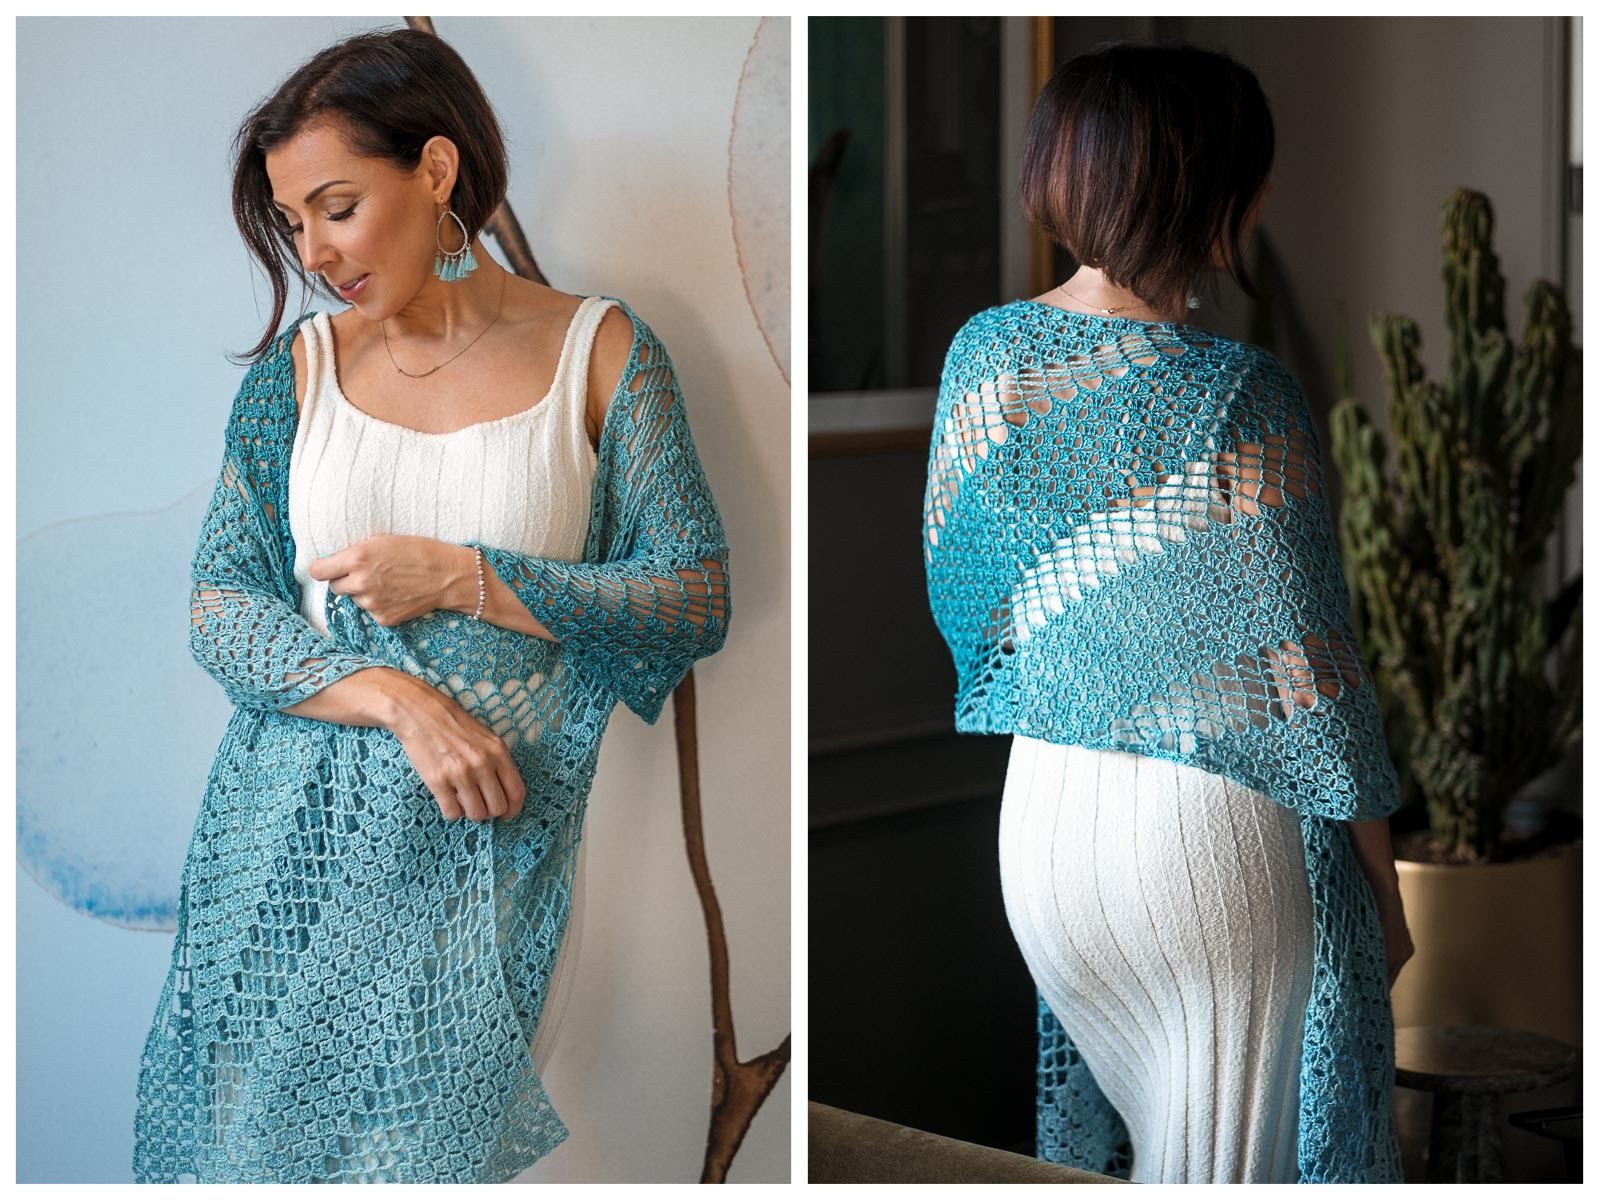
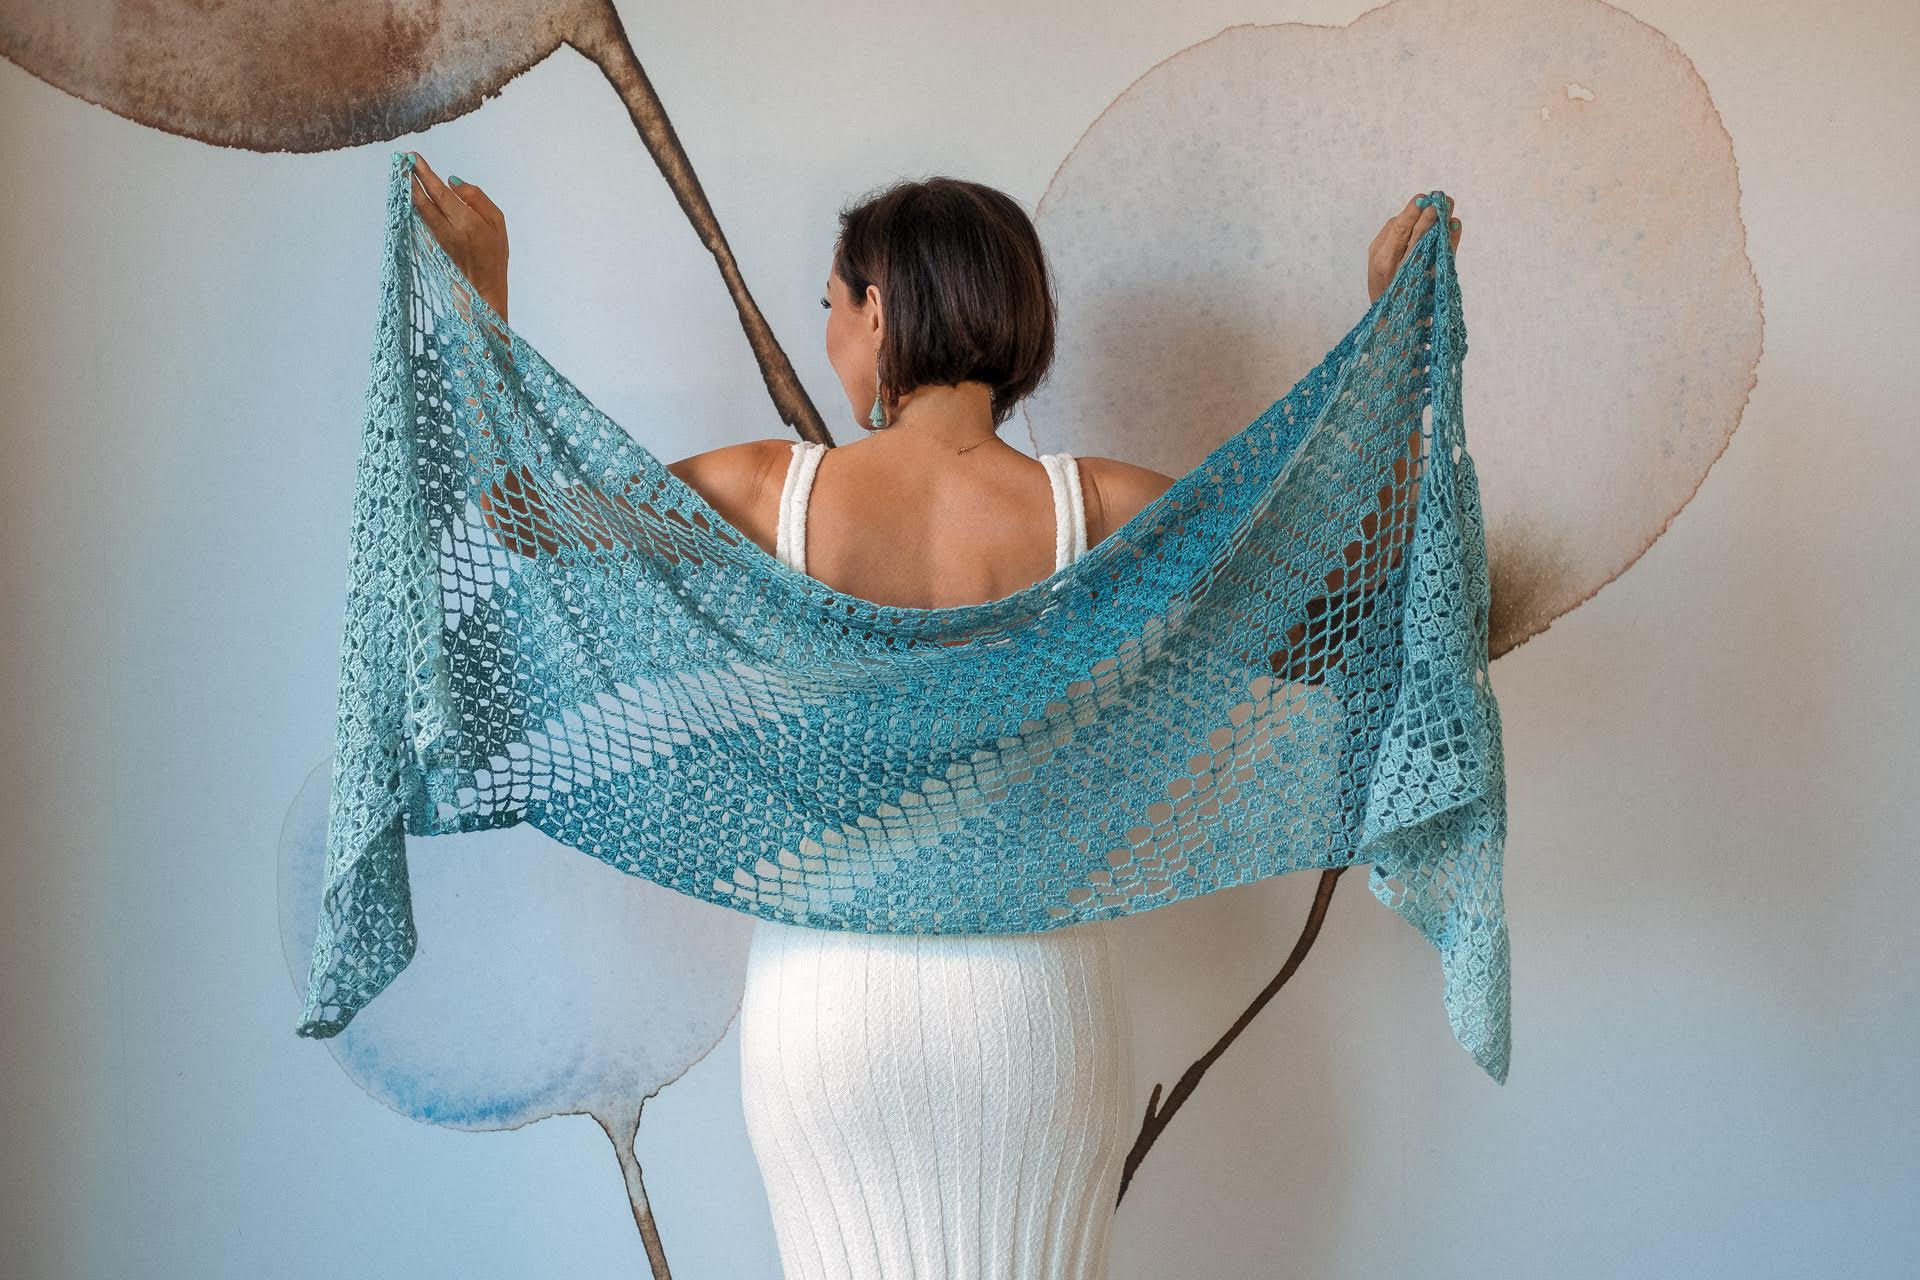
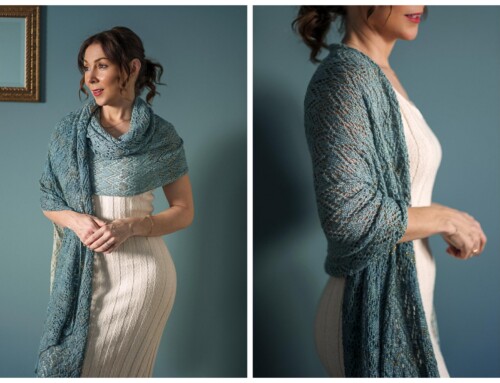
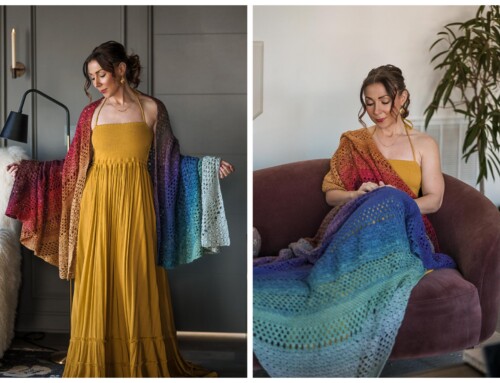
Hello, my little chickadee! Today, I have an easy, beginner level, crocheted, corner-to-corner shawl to share with you. I think you’re going to love making this beautiful design. Read on to learn all about it!
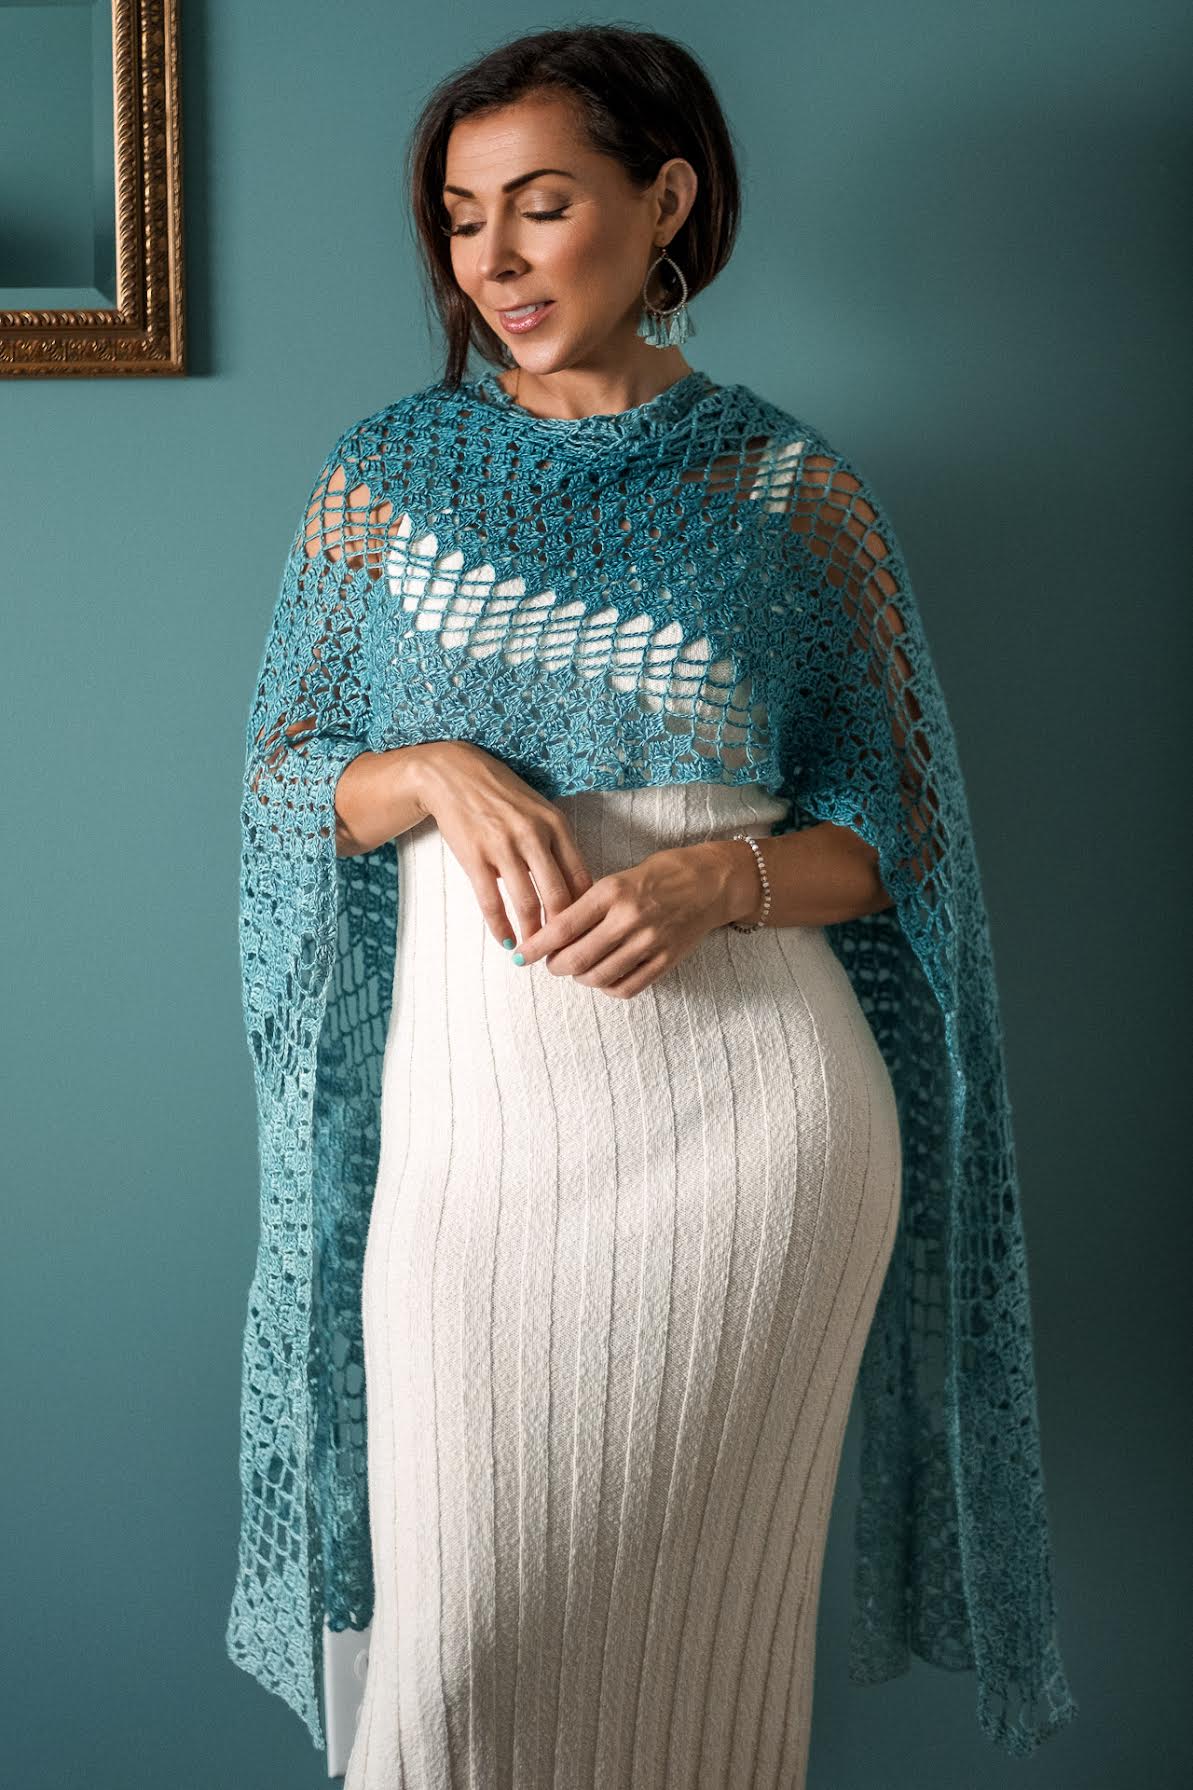
Fale was designed by Jennifer Matlock. When asked about her inspiration for this pattern, she said, “Corner-to-corner (C2C) is such a fun technique to add to a crocheter’s stitch vocabulary. Once you learn the basics of construction – increasing, maintaining, and decreasing – you have the ability to make all kinds of modifications for unique and creative adaptations to any C2C pattern.”
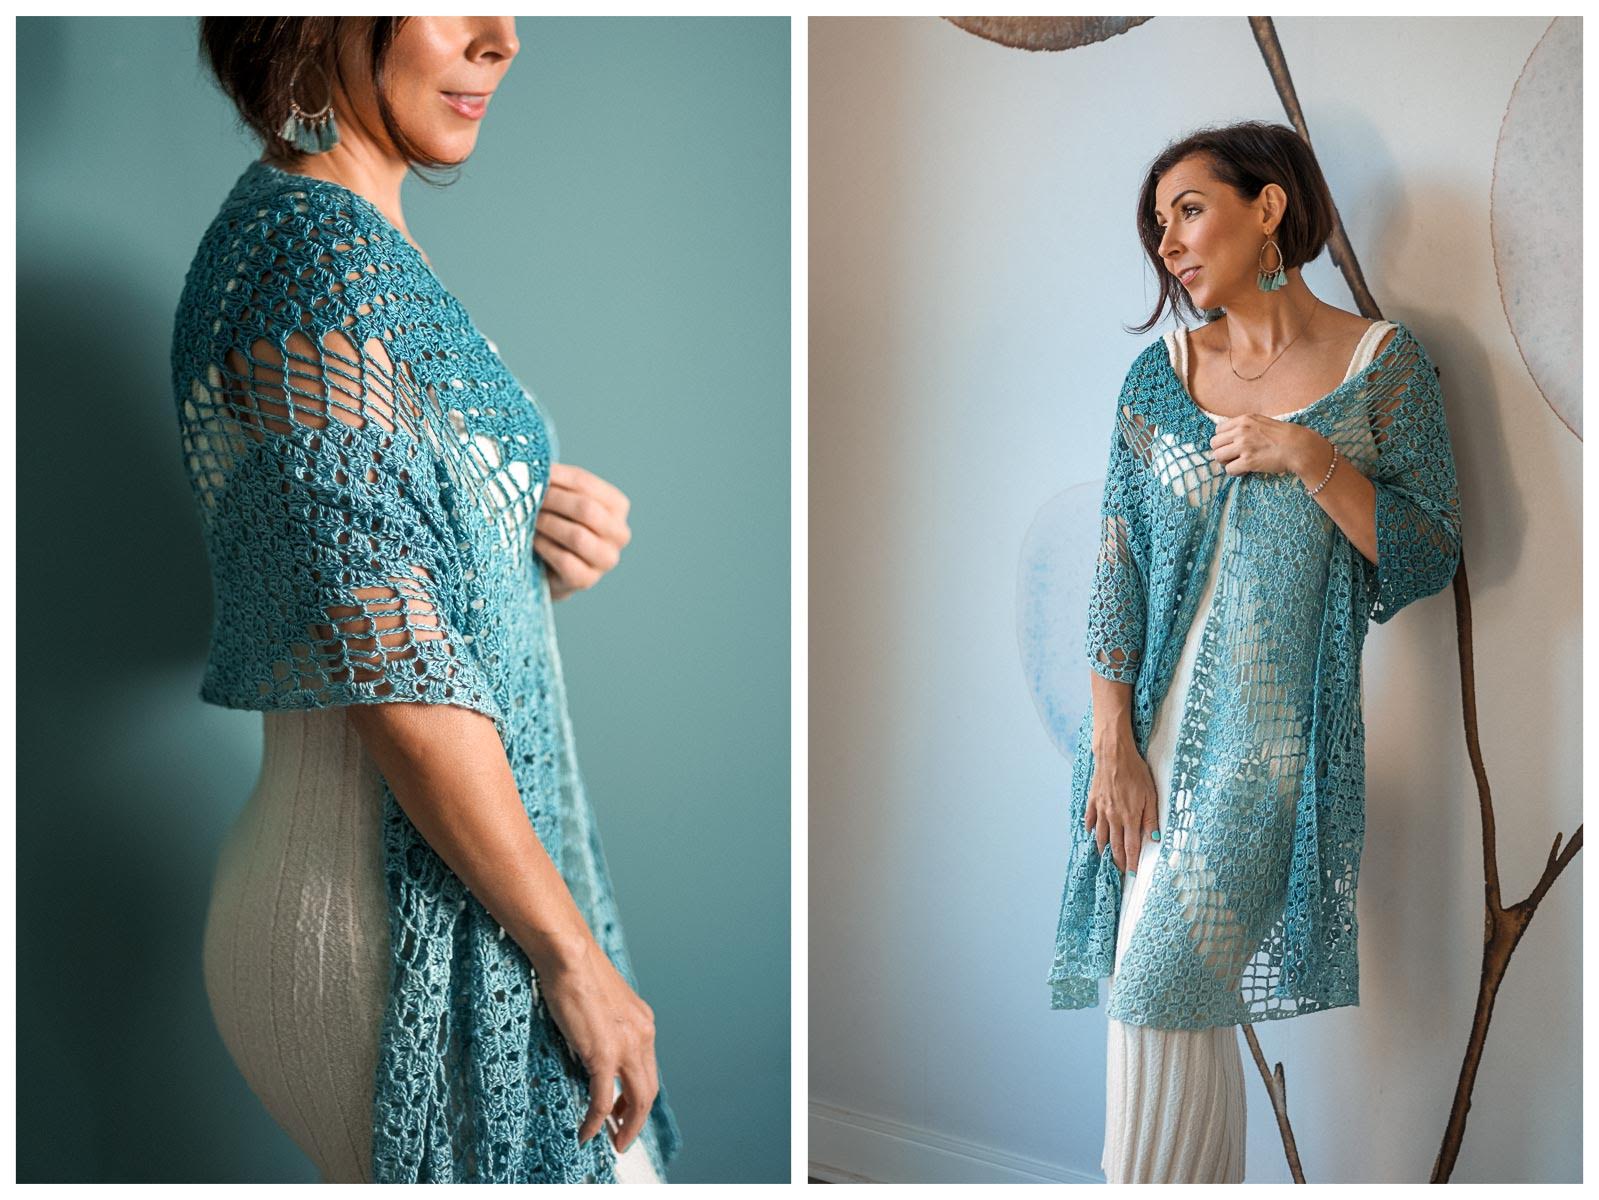 “For Fale, I began with the idea for a very simple C2C rectangle shawl, increased the hook size over what I’d normally use for this type of yarn, and added sections of lace during the color transitions to achieve an ethereal showpiece that can dress up or down.”
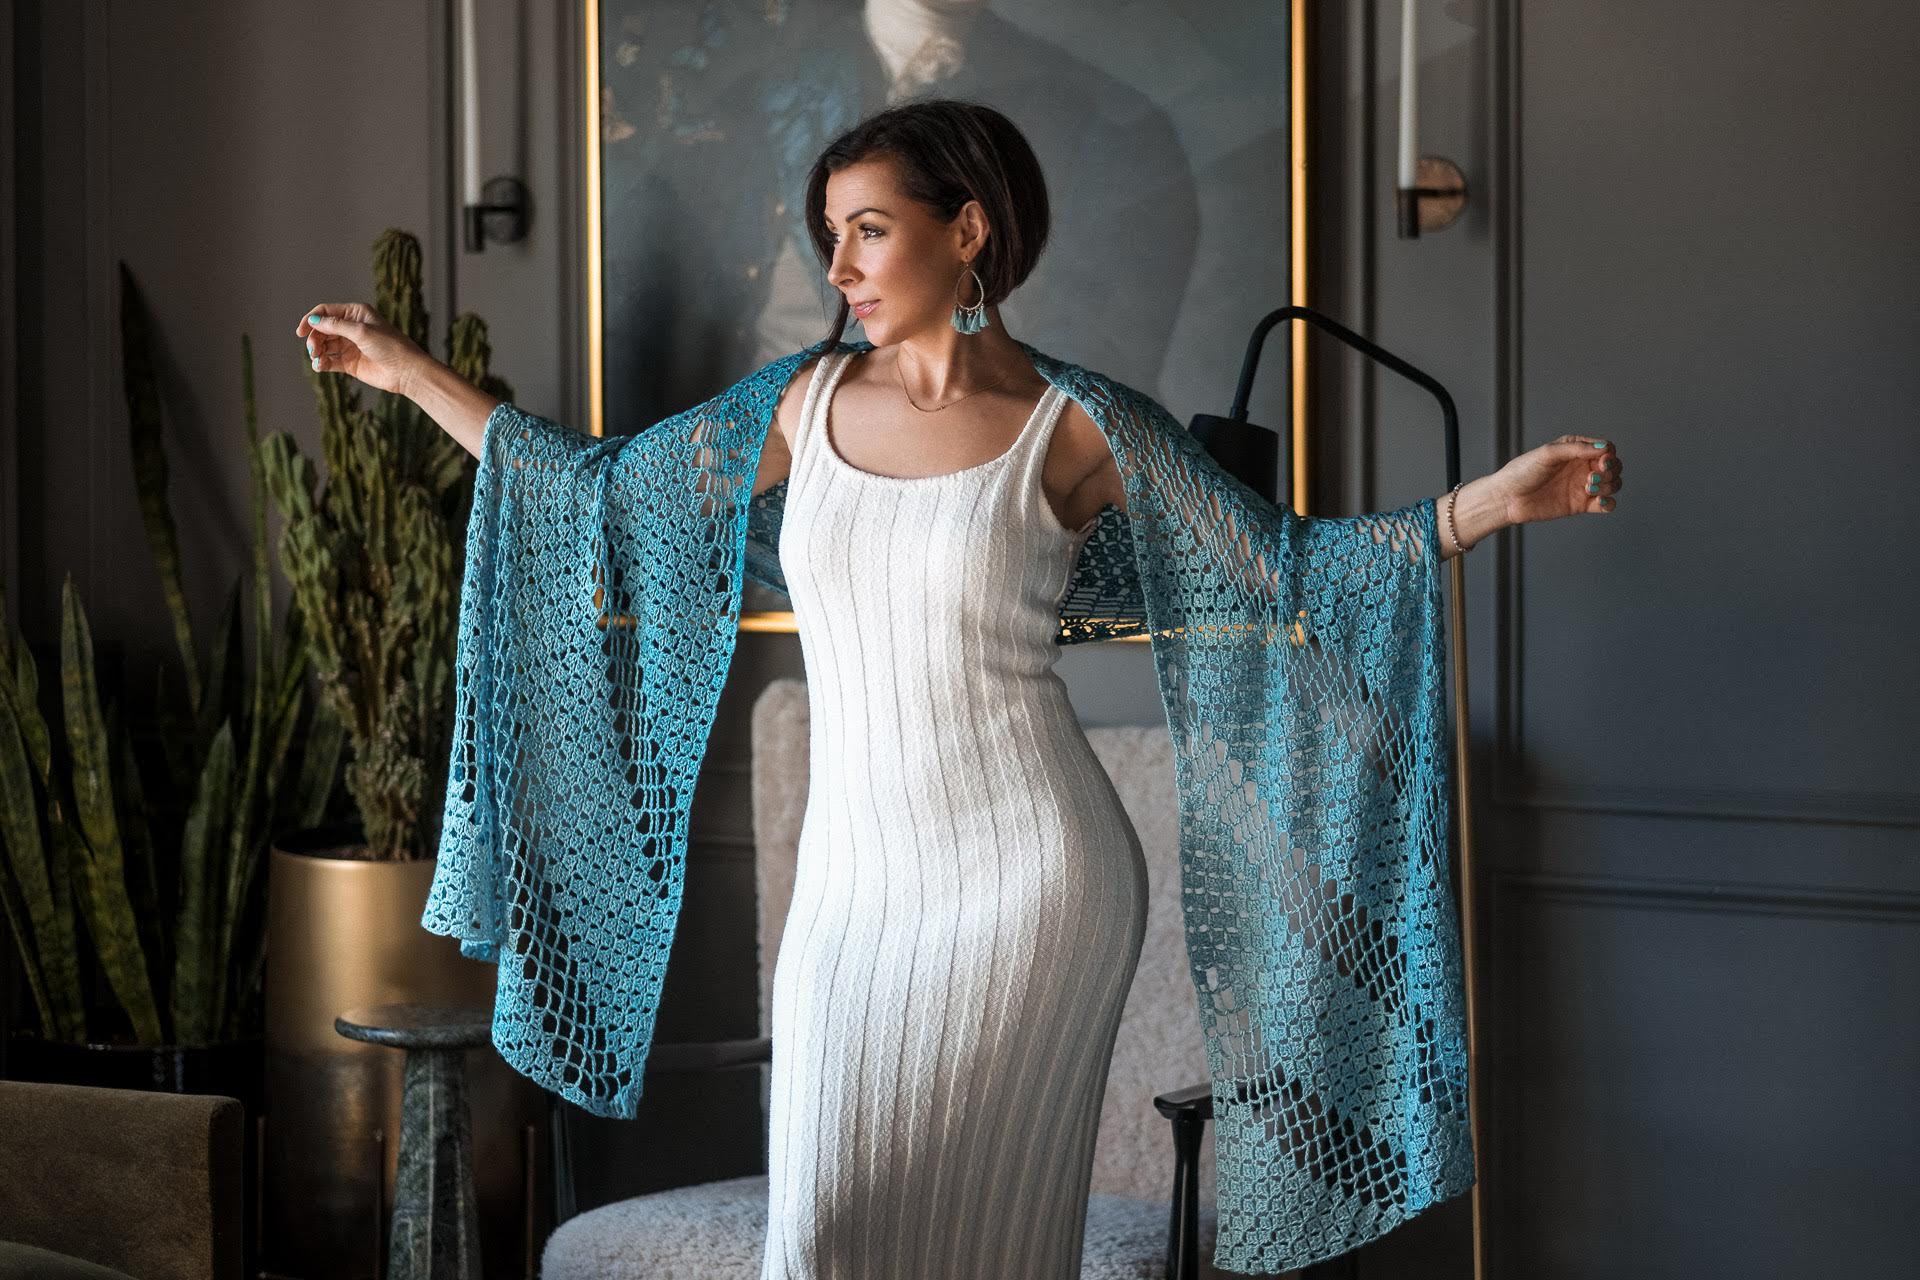
This is a Beginner to Adventurous Beginner level pattern and is suitable for crocheters who are ready to learn some new skills or stitch combinations. Skills/concepts include single crochet, double crochet, basic lace, and color changes.
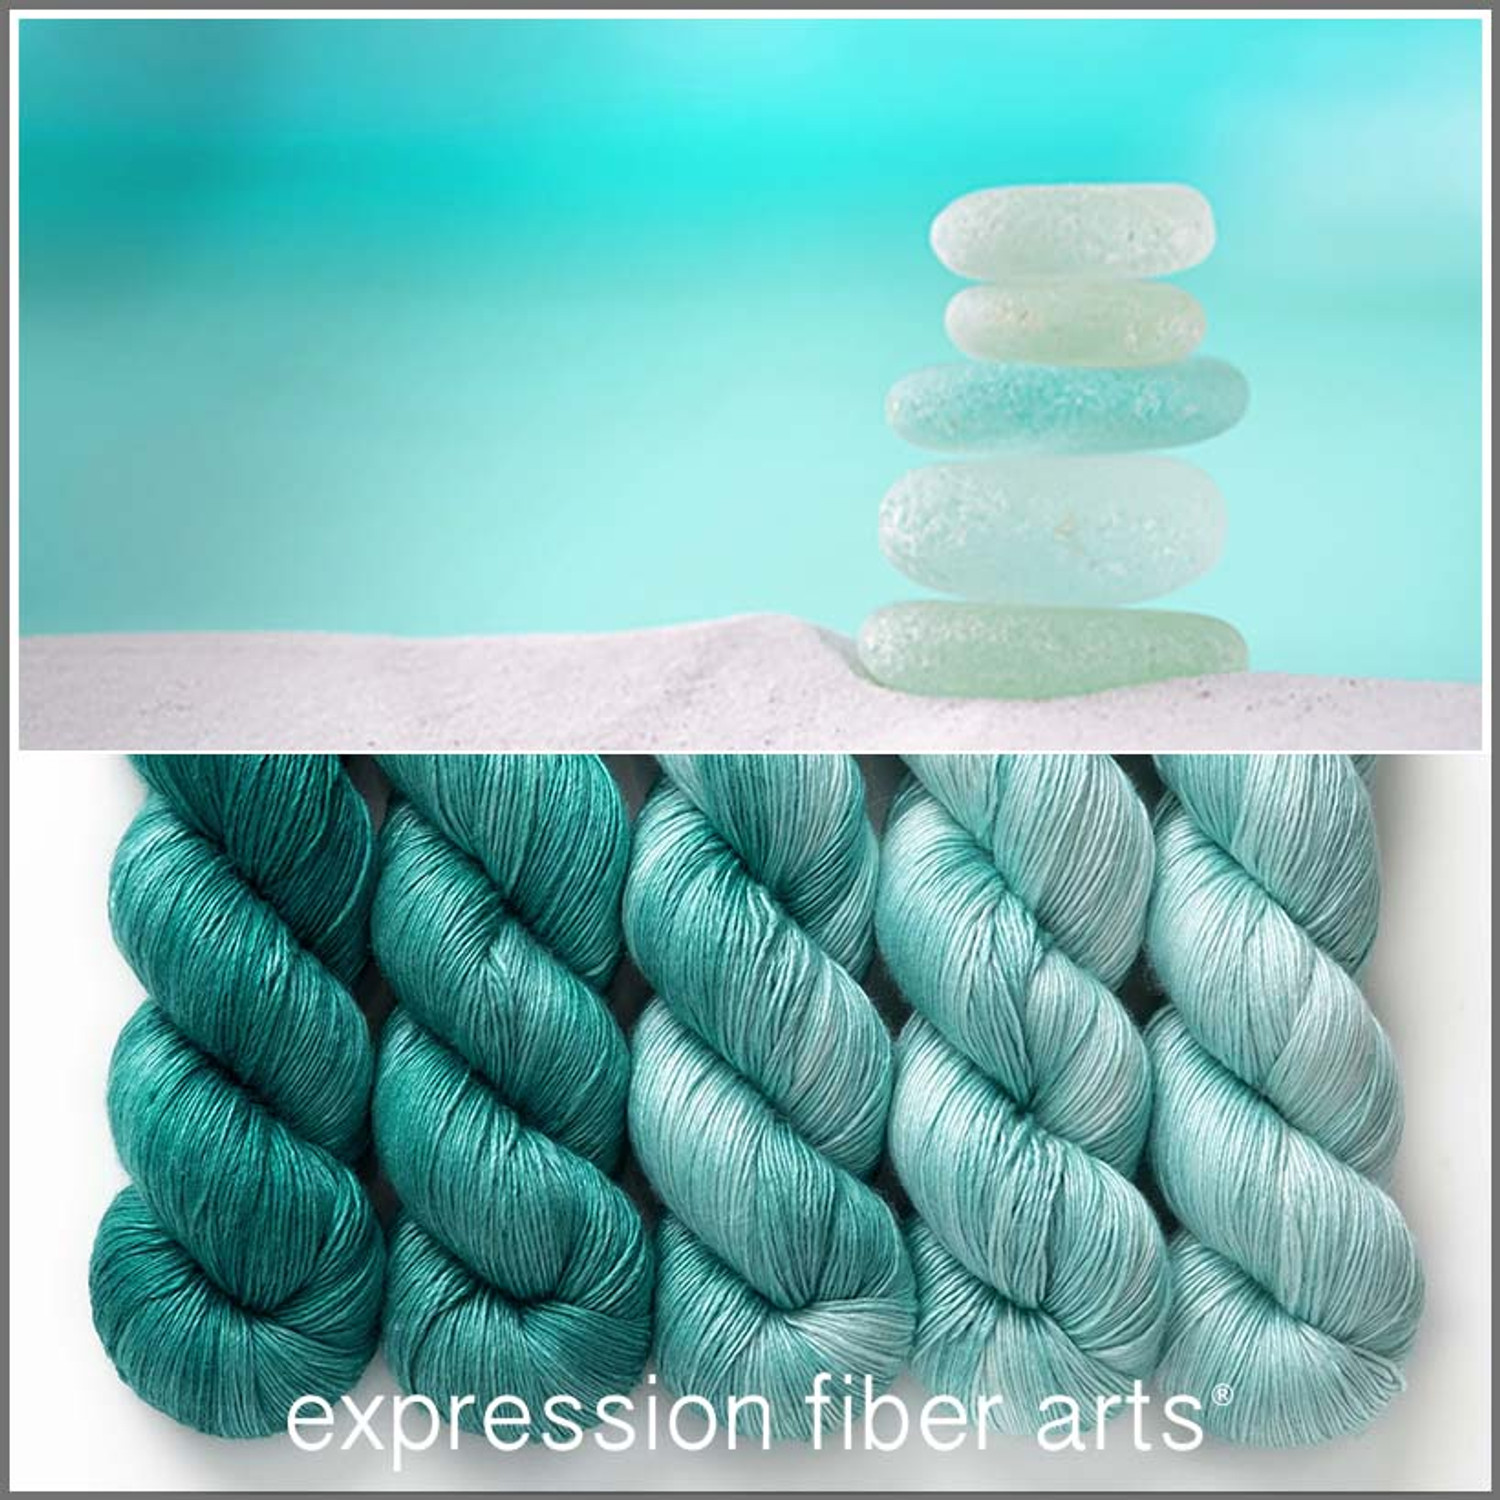
Fale is made with our luscious, luxurious Pearlescent Fingering yarn. Colors dyed onto this yarn base are super rich and saturated and appear iridescent and otherworldly! Pearlescent Fingering is a 50:50 blend of Superwash Merino Wool and Mulberry Silk. Smooth with a gorgeous gleam! When you combine these fibers into a single-ply yarn, you get subtle differences in tone, as the wool and silk take the dye differently. It’s a dreamy, fingering weight yarn that’s ideal for next-to-skin accessories like cowls, shawls, scarves, hats, and more! Unbelievably soft with a lovely drape and a shine that just won’t quit and 550 yds/503 m per skein!
We used our Sea Glass Hues Pearlescent Fingering Kit [550 yds/503 m per skein (2750 yds/2515 m per five-skein kit)] to make the sample shown here, and it used approximately 1026 yds (938 m) total: Color A: 157 yds (144 m), Color B: 287 yds (262 m), Color C: 295 yds (270 m), Color D: 213 yds (195 m), and Color E: 74 yds (68 m).
We made a video in which I talk about my love of C2C items and also show you how to crochet this shawl. Take a look!
This pattern includes written instructions only.
Download Fale today. I hope you LOVE it!! Let me know in the comments below what you think about this beautiful shawl.
I appreciate you reading, and if you’d love to get brand new, premium knit and crochet patterns weekly, just hop onto our email list there on the site. We list new patterns most Fridays, and many are free for a limited time. I hope to see you there.
Talk to ya soon.
XOXOXO Chandi
This is a beautiful C2C pattern. I’ve only done a simple C2C pattern but I love this combo with a lace pattern. So lovely! Thanks Chandi.
i am having a hard time starting row 4, can you help
Hi Jen, thank you for your comment. Have you watched our tutorial on this pattern yet? You can find it here: https://youtu.be/1Bissr2SZrc
Maybe it’ll be helpful. If it doesn’t help could you give me more details what you’re struggling with in row 4 and I’ll do my best to help. Thanks and have a lovely day! – Johanna 💞
I’m struggling with row 14. When I ch6 where do so stitch – what chain do I put it in – need to know the number of the chain stitch from row 13
Hi Angela,
the first stitch will go into the 4th chain from the hook and that the 4th chain of the 6 chains just made at the beginning of Row 14. Then you will place one dc into the next 2 chains (the 2 chains left of the ch 6). I hope this explains it! 💜
I am really struggling with the lace section rows 43 to 47.. the edge on the side that doesn’t increase is always seeming uneven or I have dropped too many blocks. I can’t seem to get the straight edge that mirrors the other side. It is not covered in the video tutorial, but I was wondering if there is another video that may help me with this section?
Hi Alison,
thank you for reaching out. I’m very sorry you’re struggling with the Fale pattern. Unfortunately, we don’t have another tutorial that covers row 43-47 but I’m sure we can figure it out. Please send us an email to info@@expressionfiberarts.com and include some pictures of your project so we can see exactly what is going wrong. Thank you and happy holidays! – Johanna 💕
Hi All, I persisted and finally got it. I am so happy as it is a lovely pattern and makes a beautiful shawl. I was missing blocks as I was slip stitching into a new ch3 sp in the newest block intead of the current block. Once I resolved that it worked perfectly. Thank you!!
I’m glad it worked out! – Johanna 🩷
Love your dress! Where did you find it?
Hi there. Help with the FALE pattern…
Instructions are clear enough about how to “decrease on one side” and continue on the other to form a long rectangle.. my problem is happening when I transition into the “Lace” section”. It’s not the same as decreasing on a full block… and the video just quits before it explains how to successfully do the transition.
Any help is appreciated !
Hi Keith, thank you for your question. I will forward it to the designer Jennifer Matlock and will get back to you once I hear back from her. Have a great day! – Johanna 💕
Hi Keith, I’m so sorry for the delay on getting back to you. The designer had a health scare in the family and wasn’t able to get back to me earlier. Here is what she says:
“Starting on Row 33, you always work/maintain an increase on one edge (beginning of odd rows, end of even rows) and work/maintain a decrease on the opposite edge (end of odd rows, beginning of even rows). That allows the shawl to grow lengthwise without getting wider. At the same time, a full block still has to be worked on either edge of the lace sections for stability, so on the increase edge the block is worked as usual at both the beginning and end of a row, while on the decrease edge this block gets worked in a location that will seem “early” at the end of a row and “late” at the beginning of the row. The decrease side block at the end of the odd numbered rows will temporarily seem to throw off the straight edge because it needs the slipped stitches followed by the full block which are worked at the beginning of the next even numbered row to straighten out that edge. So the end of row 45 will look “not straight” until the beginning of row 46 is worked.
If the side at the end of “row 44” isn’t straight even after working the beginning of the next row, the most likely culprit is that the row count is off and the incorrect row is being worked (either too soon or too late). If a previous row was skipped or repeated, the increase and decrease would both be on the incorrect side, throwing the edges off. Beginning at Row 33, you can always count the blocks on the longer edge to determine which row you’re on.”
Jennifer also included pictures (for visual assistance) that I unfortunately, can’t add here in the thread. If you send us a message through the contact form at https://www.expressionfiberarts.com/contact-us/ we’d be happy to pass those along as well!
I really hope this explanation will help you continue with the pattern.
Have a nice day! – Johanna 💜
yes that’s my problem and the pattern tells me to go up to row 12 and 13 and 14 seems to be more blocks; video doesn’t show or there is no explanation to start lace part. PLEASE HELP
I’ve answered Keith’s question below, so please take a look at the thread.
If you can’t find it here is the reply:
“Starting on Row 33, you always work/maintain an increase on one edge (beginning of odd rows, end of even rows) and work/maintain a decrease on the opposite edge (end of odd rows, beginning of even rows). That allows the shawl to grow lengthwise without getting wider. At the same time, a full block still has to be worked on either edge of the lace sections for stability, so on the increase edge the block is worked as usual at both the beginning and end of a row, while on the decrease edge this block gets worked in a location that will seem “early” at the end of a row and “late” at the beginning of the row. The decrease side block at the end of the odd numbered rows will temporarily seem to throw off the straight edge because it needs the slipped stitches followed by the full block which are worked at the beginning of the next even numbered row to straighten out that edge. So the end of row 45 will look “not straight” until the beginning of row 46 is worked.
If the side at the end of “row 44” isn’t straight even after working the beginning of the next row, the most likely culprit is that the row count is off and the incorrect row is being worked (either too soon or too late). If a previous row was skipped or repeated, the increase and decrease would both be on the incorrect side, throwing the edges off. Beginning at Row 33, you can always count the blocks on the longer edge to determine which row you’re on.”
Jennifer also included pictures (for visual assistance) that I unfortunately, can’t add here in the thread. If you send us a message through the contact form at https://www.expressionfiberarts.com/contact-us/ we’d be happy to pass those along as well!
Again if that’s not enough please send us a message through the contact form. – Johanna 🩵
did you receive any help