How To Block A Knitted or Crocheted Shawl
If you’ve ever knitted or crocheted a shawl, you may have noticed it needs a little help after completion.
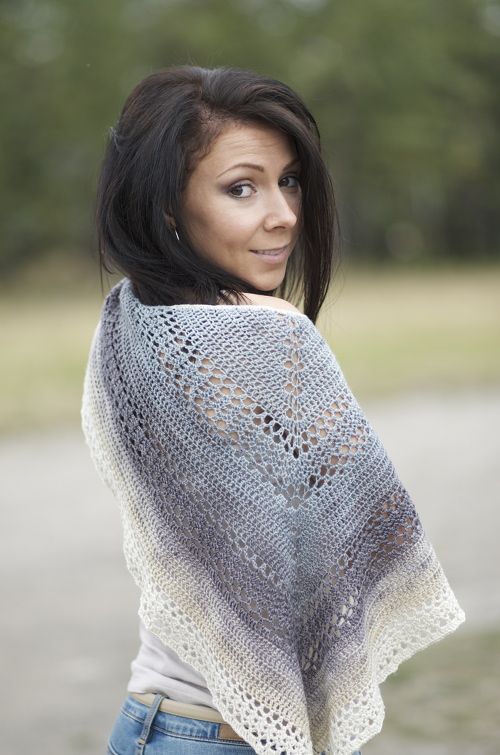
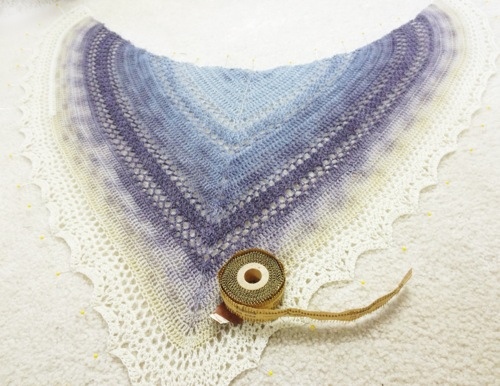
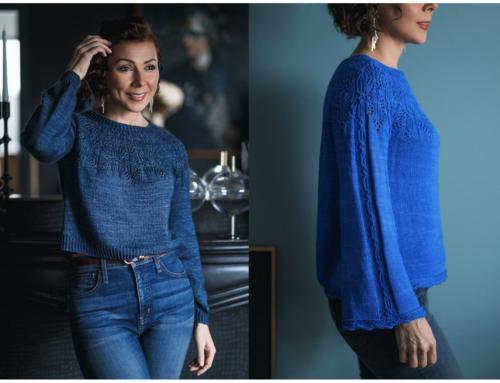
As I showed in the last post, I finished crocheting the lovely Neptune’s Tears crocheted shawl pattern.
But, as you can see, right when I finished, it looked like this:
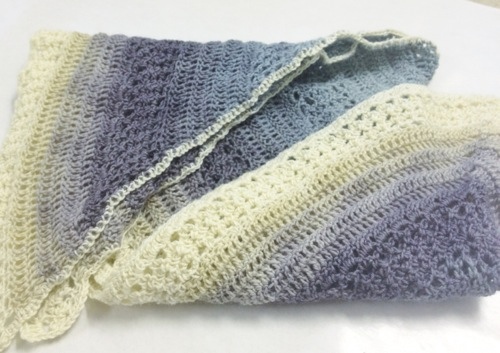
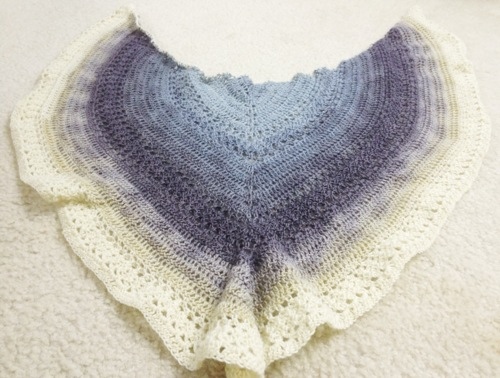
Lovely, but wrinkly.
So what’s a crafter to do?
I’ll tell ya! Blocking. Blocking is the process of using water or steam to shape and set your garment. You might be familiar with blocking already, but just in case not, here is what you need to do if you want a smoother, more professional-looking shawl.
Step 1:
Soak your item in luke warm water for about 30 minutes. You can use a wool wash like Eucalan or Soak or Woolite if you like, but it’s not necessary. Just soaking your item in water will work. Gently remove the item and squeeze out the excess water (gently! no wringing or allowing it to hang or it might distort).
Remove as much water as possible by placing into a thick towel, wrapping it up and stepping on it. Reposition in the towel and continue pressing out the excess water. Just a few times will do the trick. This will save a lot of drying time.
(For some reason, I didn’t take a picture of this!)
Step 2:
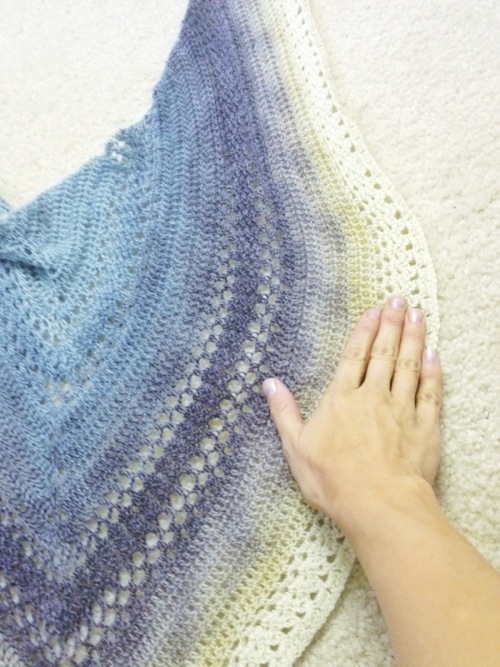
Lay your piece out onto carpet, a rug (like I did), a bed, or anything you can stick pins into. Those interlocking kids’ play mats work incredibly well if you have them. If possible to have a grid, this is IDEAL so you can measure and pin out accurately. Using your hands only at first, spread the knitted or crocheted shawl into the shape you want it.
Step 3:
Start at the corners and begin pinning your piece into more of the specific shape you want. I recommend pinning one edge and then moving over to the opposite side and pinning there, etc. This helps you to achieve a balanced shape. If you just start at one corner and work your way around, you may (read will probably) end up with a distorted shape and have to redo it.
Step 4:
Continue pinning, placing a pin every few inches (this will depend upon your specific shawl shape. Feel free to get creative and block it into whatever shape suits your fancy (within reason, of course…the shawl can only be stretched so much). Here you can see I began with this border but decided I preferred a straight edge to mimic the straight lace lines in the piece.
(Oh! Check out the cool roll of vintage pins I bought at a yard sale for $1 I think…)
Another option if you have straighter edges is to use blocking wires. These can be found online (just do a google search). Or you can go a cheaper route by going to your local hardware store and purchasing 15 gauge wire. You run these through the edge of your piece and then use the pins to hold the wire in place. This creates a great, super smooth edge.
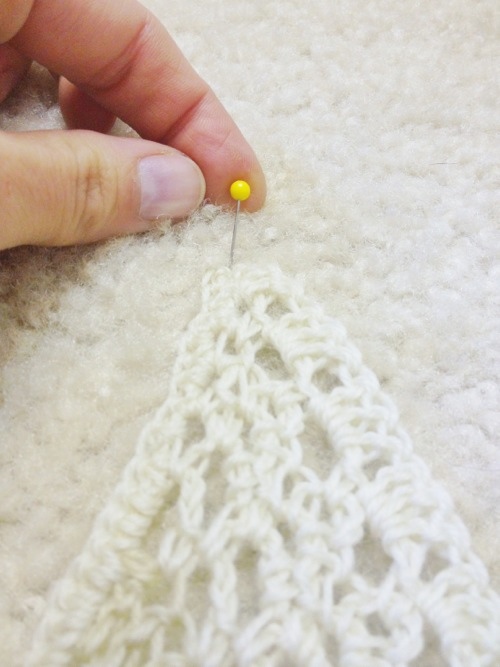
Step 5:
You may at this point have enough pins placed and be done. However, if you’re like me on this particular shawl, you’ll want to keep pinning, placing a pin every 1/2″ or so to achieve a smooth, straight edge. Normally I don’t require so many pins, but the rounded nature of this shawl’s edge just insisted on them. You can just barely make out the little tiny vintage pins between the larger, new yellow pins.

Alright now you should have something that looks like this:
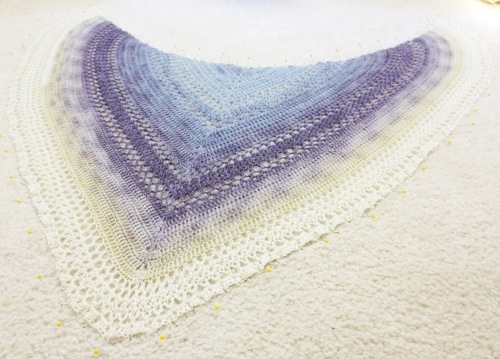
Step 6:
Allow it to dry! If you so happen to live in a warm, dry climate, then hurray!! Your knitted (0r crocheted) shawl will dry incredibly fast. Maybe in a few hours. If you live in a colder area like moi here in North Pole, you might be waiting a day or two for it to dry.
NOTES and TIDBITS to Keep in Mind:
•Other blocking methods include steam blocking (which I really love as well and use on scarves a lot) and spritzing. Steam blocking involves pinning your dry piece into place and blasting it with the steam from an iron (be careful not to touch the piece with the iron!). The other option is to pin out your shawl dry, spritz with water and allow to dry. This method works well on the more delicate fibers like silk and other luxury yarns.
•As I mentioned, you can take some liberty with the shape and edging; like the point of the triangle here. I gave it a soft “rounded point.” I could have given it a sharp point or rounded it more if I had prefered. AND! Guess what? If you decide you hate the shape even after it’s dry, just unpin it, resoak and repin. No harm done.
•If you are in a major rush, you can blow dry your shawl in about 15 minutes, after it’s pinned. It’s best to let it air-dry, though, to avoid damaging the fibers.
•THIS IS CRUCIAL. You must have the proper yarn or it just won’t block out. So what types of yarn will block (and just as important, which ones won’t?)
Fibers That Block Well:
ºMy first choice and preference (and what I currently sell in my shop and what this yarn is) is wool. Good ol’, delicious, heart-warming wool. Yes, indeed, I must do a post on the benefits of this. I shall! I shall indeed. But for now, let’s suffice it to say, WOOL BLOCKS WONDERFULLY.
ºOther animal fibers (also called protein fibers) also block well, including but not limited to: Silk, alpaca, yak, cashmere, mohair, angora, qiviut, etc. For anything other than a sturdy wool, you might consider just pinning the piece out and spritzing with water and allowing to dry, as the fibers can be fragile when wet, possibly break or stretch too much.
ºPlant fibers block as well: Cotton, for example…also linen.
Fibers That DO NOT Block so don’t try unless you’re a glutton for frustration and possibly want to ruin your knitting:
ºAcrylic. Ahhh.. Acrylic. Yes, yes. This “fiber” stirs up quite a riot in some knitting circles. For today’s purposes, let’s say it does not block. As such, if you were to create a gorgeous shawl out of acrylic but it just won’t lay flat and you thought a good blocking would fix it, then…Eek! It’s not gonna happen, unfortunately. But lessons learned are a good thing.
ºOther synthetic, man-made fibers
A Word About Blends
ºWhat if your yarn is a blend? Say 70% acrylic/30% wool? Well, it will take on properties of both. Such a blend would barely block, as it’s mostly acrylic. But if it were the reverse and 30% acrylic/70% wool, it might block out a little better, but still not as much as pure wool.
•Certain patterns just won’t maintain a blocking. For example, if you’re a knitter and you work up a big panel of stockinette stitch, IT WILL CURL. And no amount of blocking can prevent this. You might be able to help a little, especially if you block the snot out of it. But it will still have a tendency to curl up again. So keep in mind the pattern and stitch you’re doing and research a little to see if it curls.
Or even better, do a mini gauge swatch and then wash and block it like it was the real thing and see what happens. This is better than creating an entire shawl only to find it won’t block out well.
•Knowing when not to block is just as important as knowing when TO block. Blocking creates a more drapey fabric usually, so if you prefer a bouncier, more casual look, you may choose to not block your item. Totally up to you. And if you block it and decide you don’t like it blocked, just resoak it and allow to dry naturally without any blocking.
•Do you need to reblock the item if you have to wash it? Yup. It must be done all over again. So this is something to keep in mind when giving your item as a gift. Will the recipient be willing to block it should it need washed?
So there you have it, a basic tutorial on how to block hand-knit or crocheted shawls. This method works for scarves as well, and cowls and afghans/blankets and really most knitted items.
For knitted or crocheted hats that you prefer maintain a rounded crown shape, I’ve done another instructional on that at this link.
So what do you think?
Do you block your finished items? If not, what other finishing techniques do you use?
I pray you have a beautiful day!
~Chandi

I love this! I do block some things, but it depends upon what it is. I love that there are more reasons to not touch acrylic yarns!!! Yeah for natural fibers!!!
I usually steam, because I have an awesome hand-held steamer with it’s own back board thingy that lets me pin to it…. but if a blanket that needs blocked, I have to make a HUGE clear floor space and soak and pin…. (luckily have only had to do this ONCE)!
Thanks, Valorie!
I’m so glad you like the tutorial.
OHH! Your steamer sounds awesome! Would love to have one like it. Maybe someday.
Yes, sometimes I find myself stepping around a huge item pinned to the floor. Eek!!
Thanks for the comment and have a great day!
~Chandi
I always look forward to your weekly blogs … Sometimes personally newsy; sometimes chock- full of really good hints; always a worthwhile read!
As a long-time knitter, I know you’ve gotta block. Personally, I have been known to delay this final step for a looooooonnnnng time. Adding the aroma of wet sheep to the bouquet of wet dog rules out the entire Spring season for me. Usually I end up taking large items over to a friend’s house, where we use her ex-husband’s pool table (lined with yoga mats for pinning to) as blocking space. A great, productive and somewhat therepeutic use for the former man-cave.
HINT: I use the plastic line from my weed trimmer instead of blocking wires to get that nice smooth edge. It’s readily available and molds even better than those wires from yarn shops (which are outrageously expensive).
Love your shawl and have “yarn envy”. I want that long colour change ombré effect for something I have in the pipeline.
Best wishes,
Sharon
Another frugal option to blocking wires is straightening a wire coat hanger. Quite a few have been coated. Just don’t use old ones that might be a little rusty.
This is great information! Just finished a white crochet shawl for my nieces wedding day. It has scallops with picots all along the edges and they look like they could benefit from blocking. Thank you kindly.
I appreciate, cause I discovered just what I used to be looking for.
You have ended my 4 day long hunt! God Bless you man. Have a great day.
Bye
A fantastic post for this relativly novice wool crafter. Nice and clearly explained. The bit about the yarn types was particularly useful. I am now off to go and try blocking the first project that I have done that has needed it 🙂
Wish I’d read your info on blocking before I I carefully spread out the crocheted shawl I just finished for a friend, along with the appliques I’ve not added yet. My yarn is a soft baby yarn…100% acrylic! Live and learn!
Wish I’d read your info on blocking before I carefully spread out the crocheted shawl I just finished for a friend, along with the appliques I’ve not added yet. My yarn is a soft baby yarn…100% acrylic! Live and learn!
Hey would you mind sharing which blo platform you’re working with?
I’m looking too start my own blog in the near future but I’m having a difficult
time deciding between BlogEngine/Wordpress/B2evolution and Drupal.
The reason I ask is because your layout seemns different then most blogs and I’m looking
for something completely unique. P.S My apologies for being off-topic bbut I had
to ask!
Alisa, sure. We use wordpress and our current theme is Avada.
Does blocking work on something from Walmart?
Depends on the fiber type. Natural fibers would work, like animal or plant based. Man-made fibers like acrylic don’t work so well.
I loved your article on blocking. I needed a “refresher” course and I thought you explained things beautifully! So, basically I just wanted to say THANK YOU…. and I particularly loved the line “even if you block the snot out of it….”! You just made my day!
P.S. Also, you’re 100% right about good yarn! I’ve become a yarn snob & damned proud of it! 😆
💕💕
Nice tutorial. Unfortunately for me synthetic fiber yarn is only available. And ordering online can get expensive. I do well with acrylic yarns. I make brushed yarn doll wigs. Or try to, lol.
I crochet. In the process of making infinity scarves. How do I keep them from stretching? Thanks!
Thank you for the information! My daughter has really gotten into knitting and also cross-stitch. She made a beautiful shawl with cotton yarn and it is gorgeous. She made a second one and she is going to give me the first one but I told her she should block it first. I was afraid it would stretch out but I am not a knitter. I shared this on facebook with her! Thanks again!
My first choice of yarn is wool and alpaca, but acrylic can be blocked! There are good tutorials on blocking and killing acrylic, and what the difference is. I’ve done it and if done properly makes a huge difference in the item.
[…] this link and it has very detailed advice, helpful tips and how to block your shawl step by step. How to block a knitted or crocheted shawl by expression fiber […]
Thank you! You’re a life saver! My first attempt at blocking a beautiful alpaca shawl I knitted and I am excited to see how it turns out. Thanks a million!
por fin encuentro un tutorial, asi puedo comenzar a hacer mi primer chal…soy principiante pero me encanta el crochet, gracias